
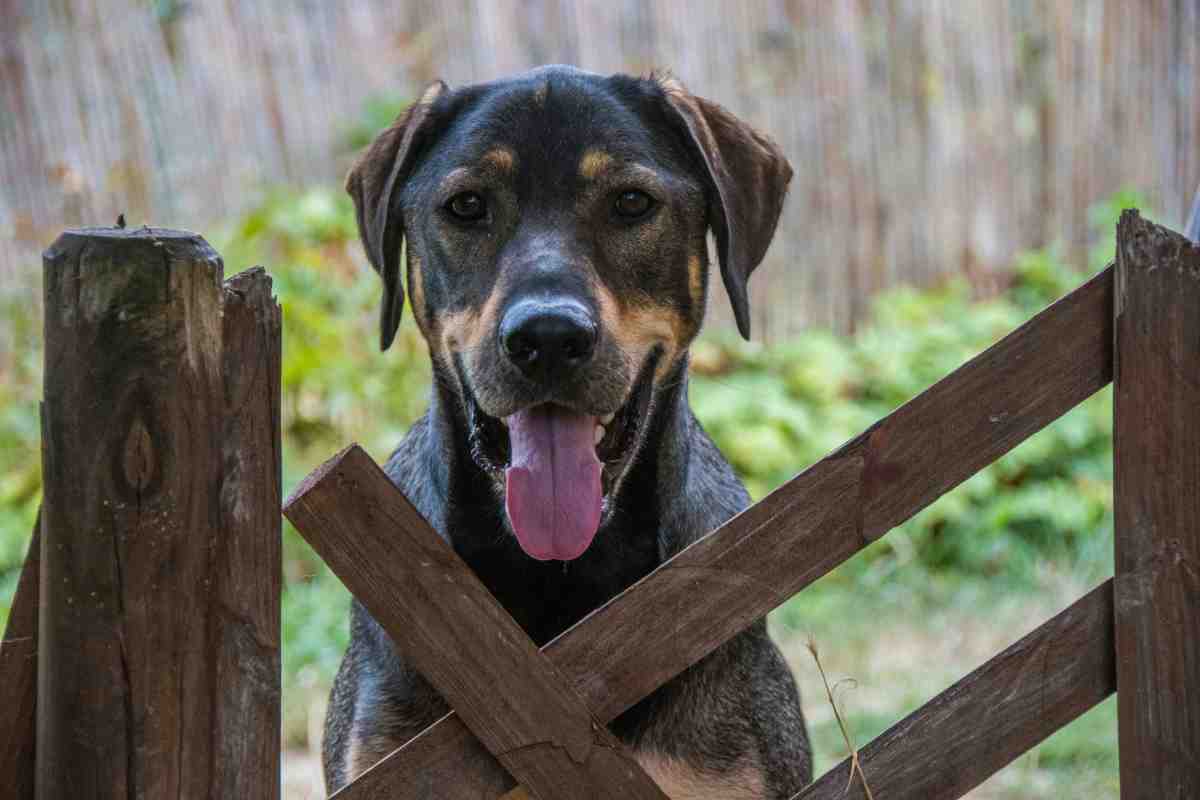
DIY Dog Fence Gate: 9 Ideas Dogs Can’t Escape
You spent a weekend building the perfect yard fence. Then your dog walked out through the gate like it was a revolving door.
A DIY dog fence gate is where most backyard escapes happen. The fence line is solid, but the gate has loose hinges, a lift-up latch, or a gap just wide enough for a determined nose. This guide shows you how to build a gate that actually holds, with real measurements, hardware picks, and fixes for jumpers, diggers, and latch-pickers.
DIY dog fence gate quick fixes at a glance:
| Observed Behavior / Sign | What It Means | Immediate Owner Action |
|---|---|---|
| Dog nudges the latch with their nose | The latch opens with a simple lift or push | Swap to a two-step or locking latch mounted above nose height |
| Gate swings open on its own | Sagging hinges or a post that has shifted | Add a diagonal brace and re-set the hinge post |
| Dog squeezes through the bottom gap | Gap is larger than 2 inches | Add a kickboard or mesh skirt to close the gap |
| Fresh holes dug at the gate base | Your dog is targeting the weakest ground | Bury L-footer wire or set a concrete threshold |
| Dog clears the gate in one jump | Gate height is too low for their size or drive | Raise the gate and add a lean-in top extension |
| Dog fixates and barks at the gate | Gate is a trigger, usually from passersby | Add solid lower panels to block the view |
| Dog slips out when you walk through | No buffer zone between yard and street | Build a double-gate airlock |
Why Your DIY Dog Fence Gate Is the Weak Spot
Dogs are pattern learners. They watch you open the gate dozens of times a week, and they learn exactly how it works.
A gate has moving parts, and moving parts fail. Hinges loosen, latches wear down, and wood swells and shrinks with the seasons. The fence panels are static, but the gate is mechanical.

There’s also a behavior side. A gate is the one spot where you appear and disappear, where the mail carrier stops, and where your dog sees the outside world most clearly. For many dogs it’s the most exciting part of the yard.
That means your DIY dog fence gate has to do two jobs. It has to hold physically, and it has to avoid creating a spot your dog obsesses over.
If your dog also gets frantic when left alone, the escape attempts may have an emotional root. Our guide on Dog Separation Anxiety Signs explains how to tell boredom from true distress.
Before You Build: Measure and Match the Gate to Your Dog
Skipping this step is the most common DIY mistake. A gate that works for a Beagle will fail a Husky.
Start with your dog’s escape style:
- The jumper (Border Collies, Labs, Huskies): needs height.
- The digger (Terriers, Beagles, Huskies): needs a solid base.
- The squeezer (small breeds, puppies): needs tight gaps.
- The latch-opener (Pit mixes, retrievers, clever mutts): needs better hardware.
Rough height guidelines:
- Small dogs under 25 lbs: 3 to 4 feet
- Medium dogs: 4 to 5 feet
- Large or athletic dogs: 5 to 6 feet
- Proven jumpers: 6 feet plus a top extension
Measure your opening twice. Standard walk-through gates run 36 to 48 inches wide. Go wider only if you need to get a mower or wheelbarrow through, and remember that wider gates sag more.
Check your gate post too. If the post wobbles when you push it, no gate will hang right. Posts should be set at least one-third of their length into the ground, ideally in concrete.
5 DIY Dog Fence Gate Ideas You Can Build This Weekend
Here are five builds, ordered from the easiest to the most secure.
1. The Classic Wood Frame Gate
This is the standard for a reason. You build a rectangular frame from 2x4s, add a diagonal brace running from the bottom hinge corner up to the top latch corner, and cover it with pickets or boards.
The diagonal brace is the secret. Without it, the gate sags within a year. With it, the gate stays square for a decade.
Best for: most medium and large dogs, and anyone who wants a matching look.
2. The Welded Wire and Cedar Frame
Build a cedar frame, then staple 16-gauge welded wire (2×4 inch openings or smaller) across the inside. Cover the cut edges with trim so nothing pokes out.
This design is lightweight, cheap, and lets air and light through. Use smaller mesh for puppies and small breeds, because a 2×4 inch opening can trap a snout or paw.
Best for: budget builds and dogs that panic when they can’t see out.
3. The PVC Pipe Gate
PVC is light, rust-proof, and easy to cut. Use 1.5-inch schedule 40 pipe, glue the joints, and add a wooden or metal cross-brace for rigidity.
This works well for small dogs and temporary setups. Skip it for big chewers or strong jumpers, because PVC can crack under repeated impact.
Best for: small dogs, renters, and temporary yard sections.

4. The Pallet Gate
Reclaimed pallets make a sturdy, nearly free gate. Pick heat-treated pallets stamped “HT” and avoid any marked “MB,” which means methyl bromide treatment.
Sand every surface, pull out protruding nails, and seal the wood with a pet-safe outdoor finish. Pallet slats often have wide gaps, so line the lower half with mesh.
Best for: rustic yards and tight budgets.
5. The Double-Gate Airlock
This one takes more space but is the gold standard for escape artists. You build two gates in sequence, creating a small holding area between the yard and the outside world.
You enter the airlock, close the first gate, then open the second. Even if your dog bolts, they hit a closed gate before they hit the street.
This design is worth the effort if you live near traffic or own a dog with a strong bolt reflex. If your dog’s escape drive spikes at night, our guide on Dog Barking at Night can help you spot the trigger.
Dog-Proof Latches: What Most DIY Gates Get Wrong
You can build a perfect frame and still lose your dog to a $4 latch.
Smart dogs open lift-and-swing latches in days. They watch, they nudge, and they learn. A DIY dog fence gate needs hardware that is more complicated than your dog’s patience.

Latches that work:
- Two-step gravity latches with a locking pin. You lift and then slide, which most dogs can’t coordinate.
- Spring-loaded self-closing hinges. These pull the gate shut every time, so a forgotten latch isn’t a disaster.
- Magnetic locking latches (like the popular pool-gate style). These are mounted high and need a key or a pull on an inside release.
- Carabiner clips as backups. A screw-lock carabiner adds a cheap second layer.
Latches to avoid:
- Simple thumb-lift latches at dog-nose height
- Hook-and-eye closures
- Slide bolts mounted low on the gate
Mount your latch at 48 inches or higher when possible. Dogs can’t see or reach it, and kids can’t open it either.
Use exterior-grade, galvanized or stainless hardware for every hinge, screw, and latch. Standard indoor screws rust quickly and snap under stress.
Stop Diggers and Jumpers at the Gate
Even a perfect gate fails if your dog goes under or over it.
Fixing the Bottom Gap
The ground under a gate is the softest, most-trafficked dirt in your yard. Dogs know it.
Keep the gap under 2 inches, or under 1 inch for small breeds. If the ground is uneven, fill the low spot with a concrete or paver threshold the gate swings over.
For persistent diggers, bury L-shaped wire footers 12 inches deep, bent outward at the bottom, so digging hits metal. Our full breakdown in How to Stop a Dog From Digging Under Fences covers more options.
Raising the Top
For jumpers, add a lean-in extension, which is a 12 to 18 inch angled section tilted inward at 45 degrees. It stops most dogs from getting a paw over the top.
Avoid adding sharp wire or spikes. They can seriously injure a dog that tries and fails.
Blocking the View
Many gate-fixated dogs bark, lunge, and eventually learn to escape because the gate is where the action is. Solid lower panels (the bottom 3 feet) cut visual triggers and reduce reactive behavior.
You can keep the top half open for airflow and light, but make the part at eye level solid.
Train Your Dog to Respect the Gate
Hardware does most of the work, but training closes the loop. A dog that understands the gate rules is far less likely to test them.
Teach a “wait” at the threshold. Ask your dog to sit before you open the gate, and release them only on your cue. Practice this daily, and it becomes automatic.
Use a calm-door routine:
- Approach the gate with your dog on leash.
- Ask for a sit.
- Open the gate slowly.
- Wait for eye contact.
- Release with a clear word like “okay.”
Reward the right behavior. Give a treat when your dog stays put while the gate is open. Over weeks, they learn that patience pays and rushing doesn’t.
Also give your dog a reason to stay. Escape attempts usually come from boredom, under-exercise, or anxiety. A tired dog with puzzle feeders and daily walks rarely hunts for gaps.
When to See a Vet
Escape attempts and gate fixation can have medical or behavioral causes. If your dog’s behavior changed suddenly, check this list.
Probably fine to handle at home:
- Your dog tests the gate occasionally but gives up quickly
- Digging happens mostly in cool weather or when the dog is bored
- Barking at passersby stops when the view is blocked
- Your dog is eating, drinking, and playing normally
Call your vet soon:
- Sudden, intense escape attempts in a dog that never did this before
- Raw, bleeding, or broken paw pads or nails from digging or scratching at the gate
- Panic, drooling, trembling, or destructive behavior when left alone
- Disorientation, pacing, or circling that doesn’t settle
- Signs of injury after a failed jump (limping, yelping, reluctance to move)
- Fear of thunder or fireworks that triggers frantic escape attempts
Sudden behavior changes in older dogs can point to pain, vision loss, or cognitive decline. A vet visit rules out medical causes before you spend money on a bigger gate.
DIY Dog Fence Gate FAQs
How tall should a DIY dog fence gate be?
Match the gate to your dog’s size and jumping ability. Small dogs need 3 to 4 feet, medium dogs 4 to 5 feet, and large or athletic dogs 5 to 6 feet. Proven jumpers may need a 6-foot gate with a lean-in top extension.
What is the best latch for a dog-proof gate?
A two-step locking latch mounted at 48 inches or higher is the most reliable choice. Pair it with spring-loaded self-closing hinges for extra security. Avoid simple lift latches, which smart dogs learn to open.
How do I stop my dog from digging under the gate?
Keep the bottom gap under 2 inches, and add a concrete threshold or buried L-shaped wire footer across the gate path. Also exercise your dog more, since digging is often a boredom behavior.
Final Thoughts: Build a Gate Your Dog Can’t Outsmart
A good DIY dog fence gate isn’t about fancy tools. It’s about thinking like your dog.
Match the height to their jumping ability, close every gap, upgrade the latch, and add a diagonal brace so the frame stays square. Then back it up with a simple “wait at the gate” habit.
Start with the biggest weakness first. If your dog opens the latch, fix that tonight. If they dig, add the footer this weekend. Small fixes stack up quickly, and a secure DIY dog fence gate gives you real peace of mind every time you open the back door.


One Comment